So, you’ve heard of smart contracts. And now you want to see one in action.
Thanks to the age of developer-friendly tools, it is extremely simple to get started with building smart contracts.
For this walk-through, we’ll be deploying an Ethereum contract using Remix to a local Ethereum network.
Some background -
But first, for some background,
What is… Remix? New Black Pink song?
No, it’s better. It’s the fast track into the world of smart contract development.
Remix is an IDE for developing smart contracts. And given that it has an incredibly accessible web application, it is often used as a playground for baby Ethereum developers, like ourselves.
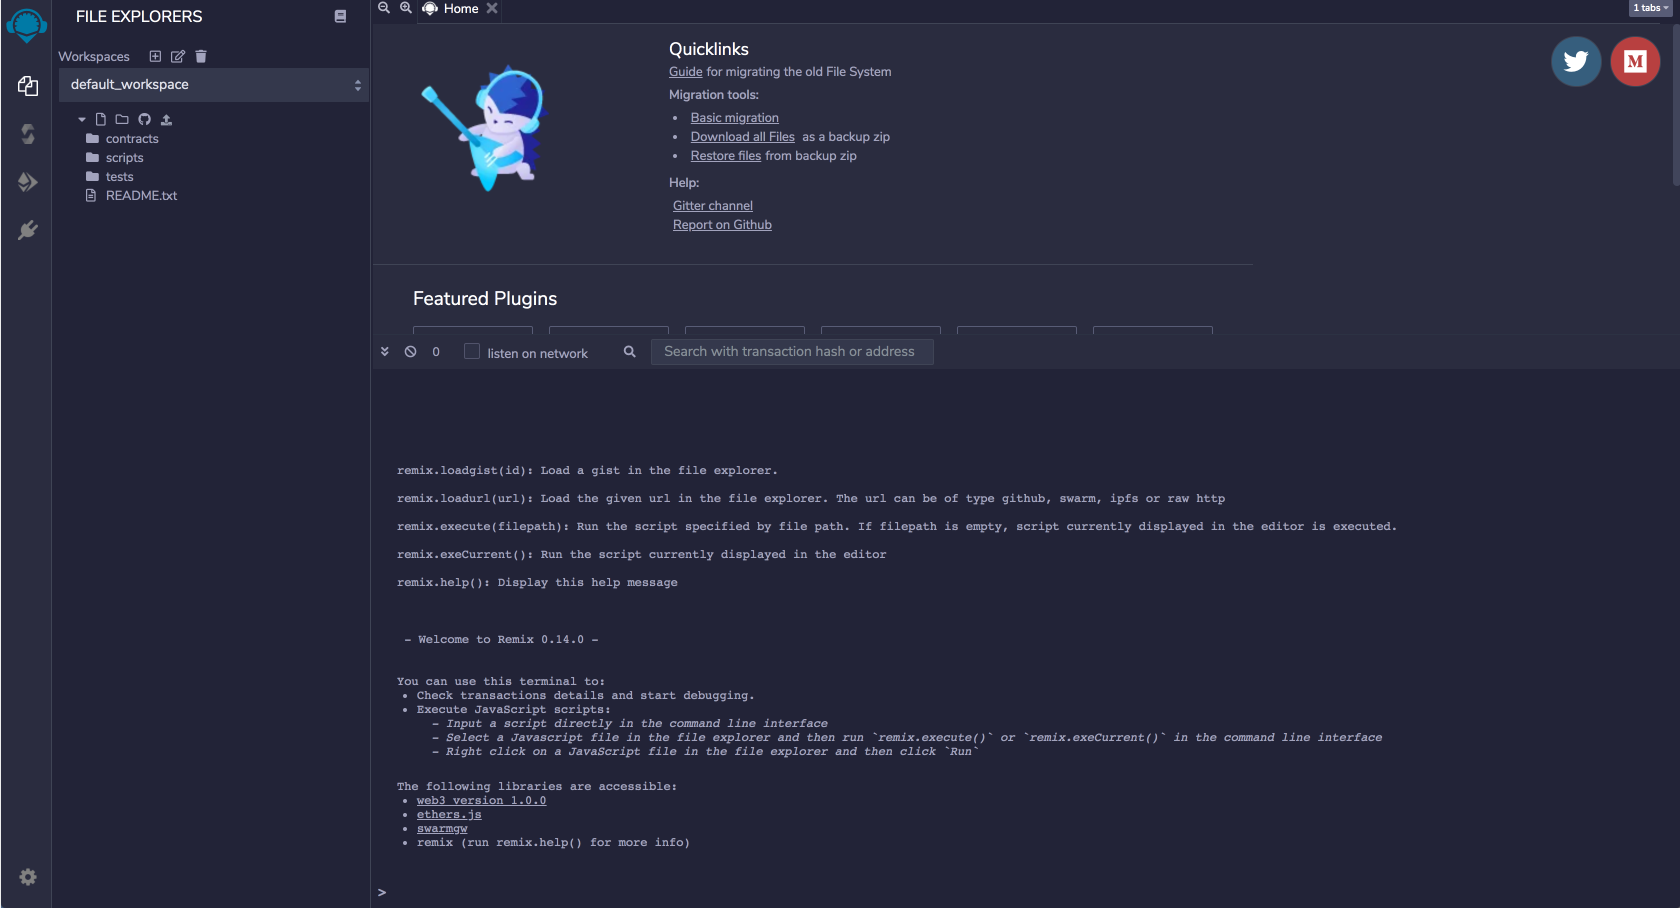
So, here’s Remix.
There are the docs.
And this is what it looks like,
Um, what’s a smart contract again?
Smart contracts are code deployed on a decentralized network. They usually encode the terms of an agreement (hence, the word contract, duh!) and auto-execute when the required conditions are met. Since they are deployed on trustless networks, there is no time loss or external involvement required to execute the contract - which makes them dependable and secure.
Ok, but what do you mean by “deploy a contract”?
Deploying a contract means making the program and its functions, available to users on the network.
To deploy a contract on Ethereum, we make an Ethereum transaction with the code of the compiled contract. The contract then lives at a specific address, and its functions can be invoked by other transactions.
Another important point - the contract is deployed as a transaction. Which means that it requires gas and fees. Which is just another way of saying that deploying a contract is NOT free. Yes, no more random unlimited deploys.
The Deploy -
Ok, now that we have some basics covered, let’s go ahead and deploy an example contract.
Tools you’ll need
-
Remix IDE You’ll need an IDE to write, compile and deploy your contract. Remix is the fastest out-of-the-box option:
-
MetaMask To deploy your contract, you’ll also need Ether. If you are using Remix and want to deploy your contract to different networks, an easy way of accessing your Ether is by using a Crypto Wallet. So go ahead, install the MetaMask Chrome Extension. Be careful though - make sure you are not using real Ether. Unless you have too much, in which case, please send me some.
-
Ganache You can choose to deploy to one of the test networks (or even the real Ethereum network, if you are bold .. and rich!). But to make things easier, I used Ganache to setup a local Ethereum blockchain to deploy to. You can setup one using Ganache, connect MetaMask to the local network and add a test account to MetaMask. And voila … you’ll have enough Ether to deploy. And yes, I agree that the blockchain world has some very tasty names.
What does the contract look like?
Remix comes pre-loaded with three contracts of increasing complexity. You can find them by clicking on the Workspaces tab on the left.
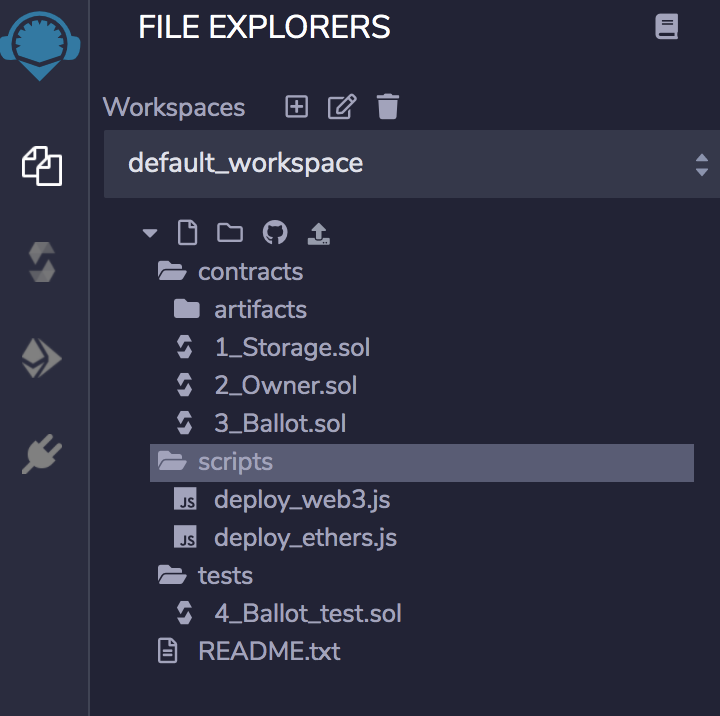
The contracts are written in Solidity. Here’s the simplest one that we’ll be deploying -
// SPDX-License-Identifier: GPL-3.0

pragma solidity >=0.7.0 <0.9.0;

/**
 * @title Storage
 * @dev Store & retrieve value in a variable
 */
contract Storage {

  uint256 number;

  /**
    * @dev Store value in variable
    * @param num value to store
    */
  function store(uint256 num) public {
      number = num;
  }

  /**
    * @dev Return value
    * @return value of 'number'
    */
  function retrieve() public view returns (uint256){
      return number;
  }
}
Let’s Compile
Before we can deploy, we need to compile the contract into byte code. To do that, shift over to the Compiler Tab. The contract that you want to compile should be active in the workspace. If it is, you’ll see the enabled Compile button with the name of the contract that you’ve selected. Click on it to compile.
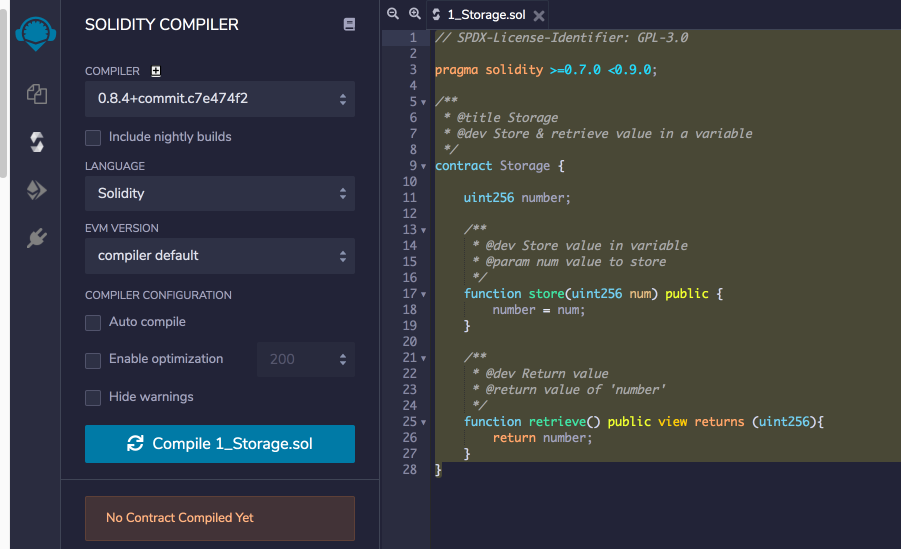
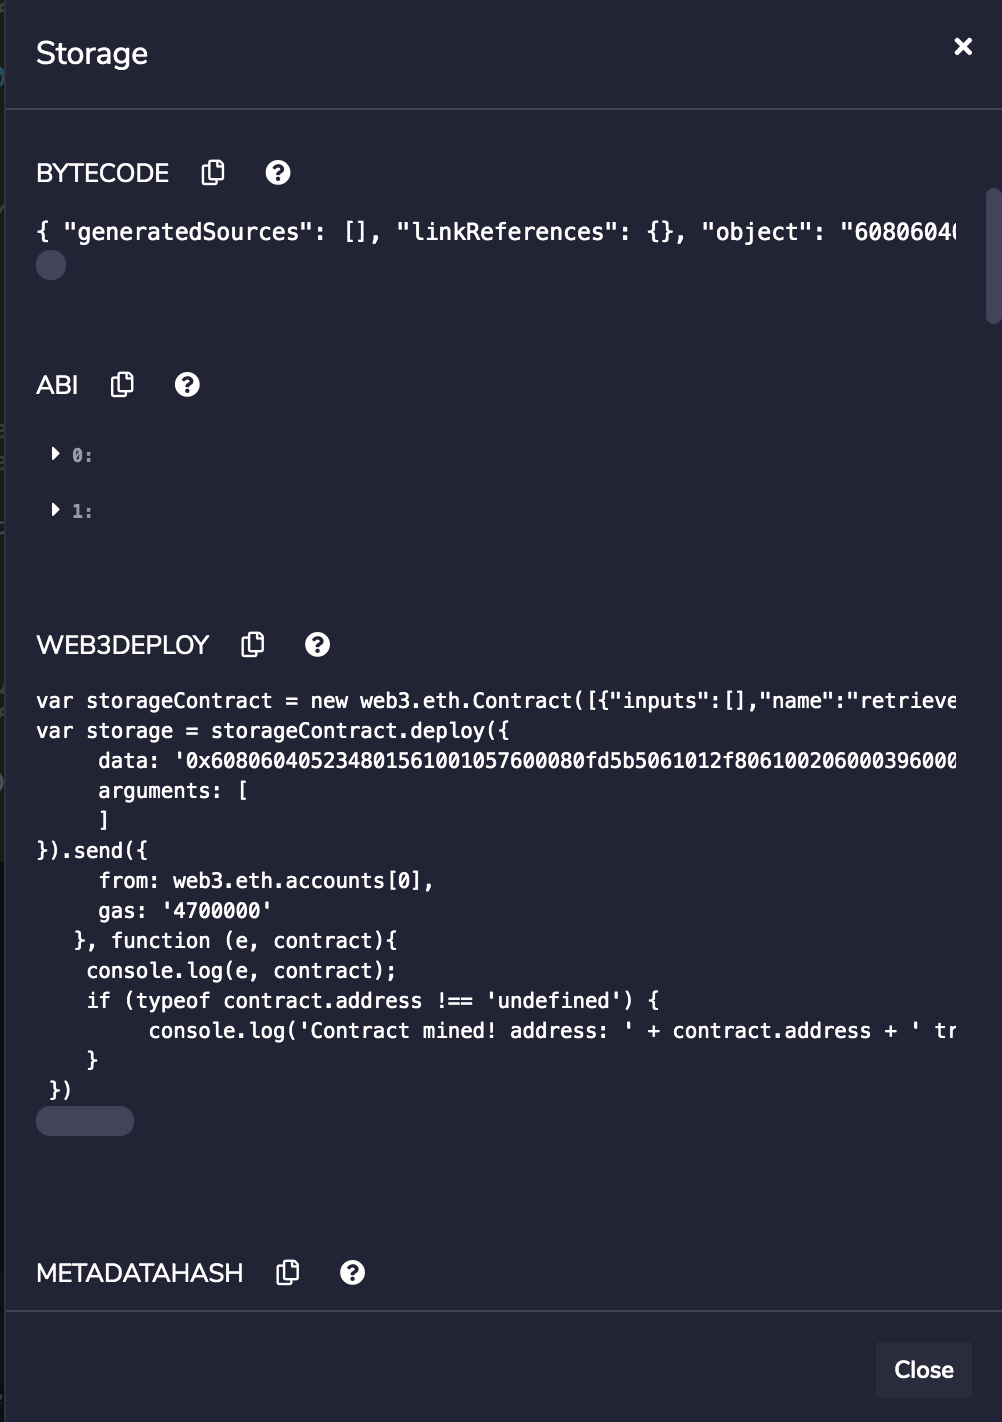
And that’s it. We’ve compiled the contract. For the nerd in you, click on Compilation Details, to checkout details, the ABI and Bytecode - the actual payload that gets deployed.

And now, for the deploy!
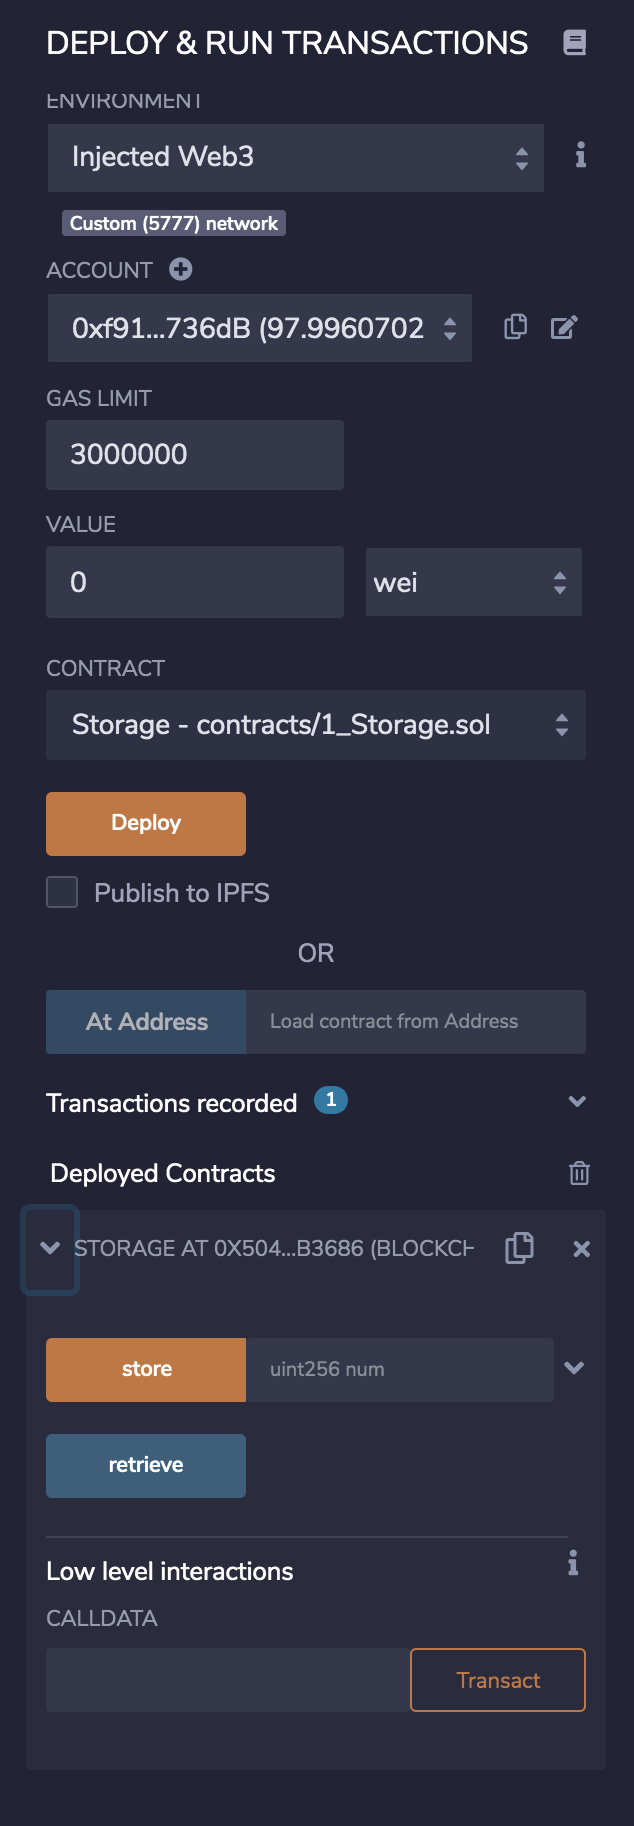
Move to the Deploy and Run Transactions Tab. If you are using Metamask, select Injected Web3 as your environment.

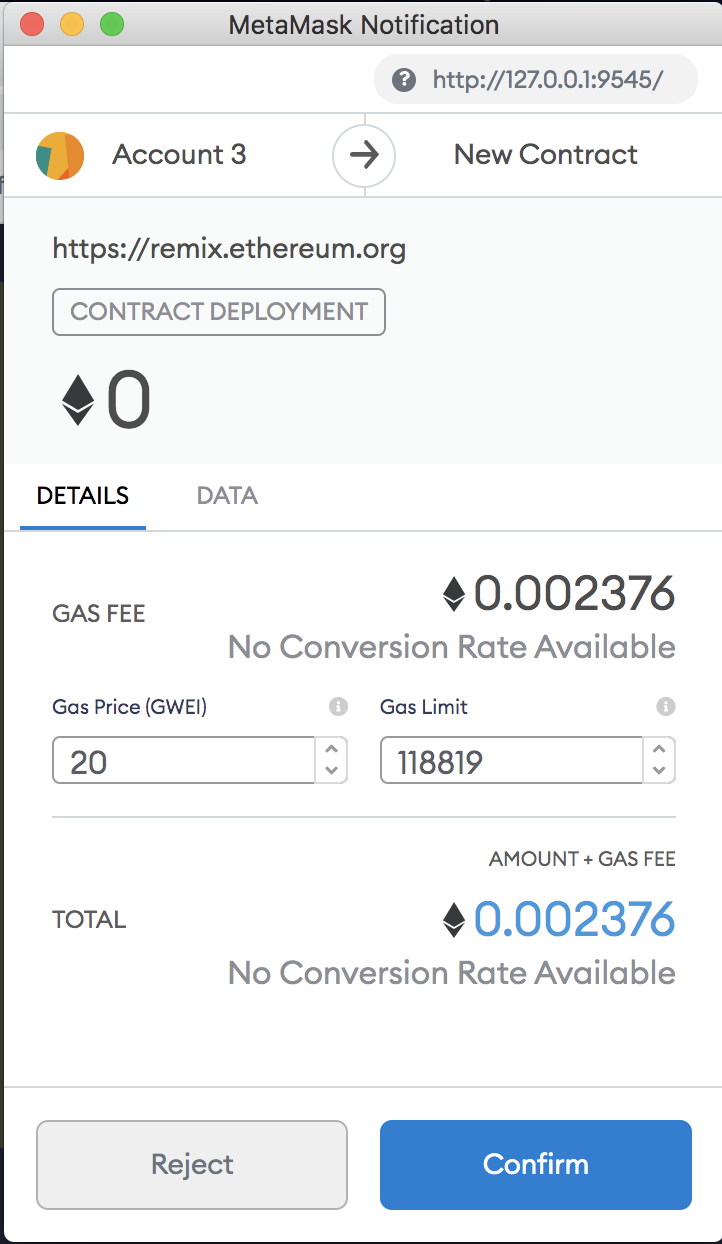
Metamask will then show up, asking you to log in, if you haven’t already.
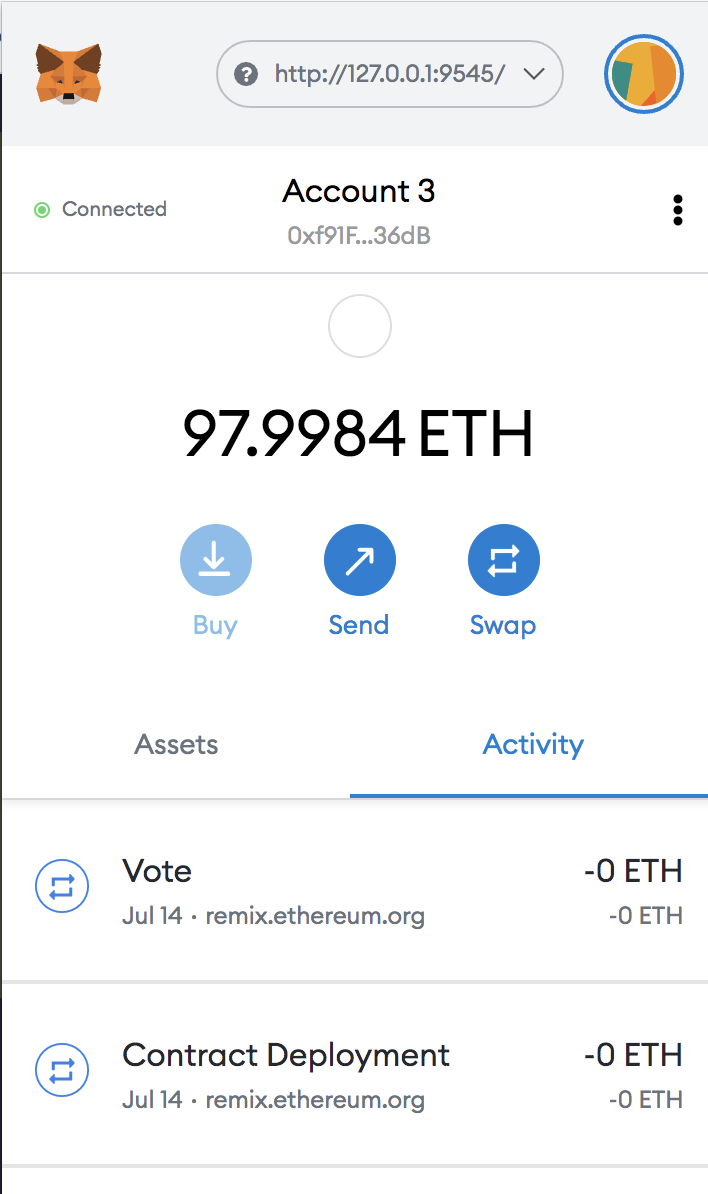
This is what my Metamask, connected to my local Ethereum looks like. (Look Ma - double-digit ETH!)
Hit the Deploy button in the Deploy Tab, and MetaMask will ask you to confirm the transaction.
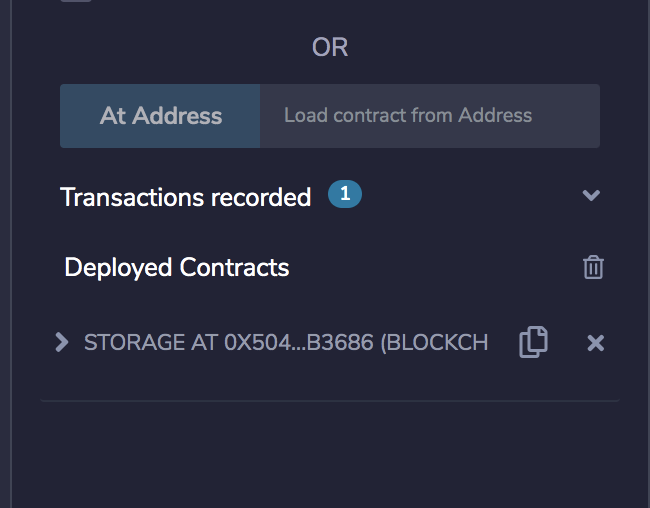
Once you do, you’ll now be able to see your deployed contract details in the tab - ready to transact with!
Move over to Ganache, and you’ll see a contract creation transaction listed.

And just like that, you’ve deployed your first smart contract. Ciao!